Make up
Makeup looks better when it looks more natural, but lets not get confused, natural doesn't need to mean neutral! It means to make it look like it blossomed from your face accenting your beautiful skin tone no matter what color it is.
Makeup is an art. Everyone should be free to be as creative as they wish with it. Wear makeup that expresses the beautiful girly girl in your heart, with the colors, and styles you love. You don't have to get stuck in a rut of only serious or bland styles. Make-up shouldn't be a chore, it should be fun! Here I'll share makeup info, tips, and secrets the professionals use that allow you to be beautiful, natural, and creative as you'd like.
Make Up tools
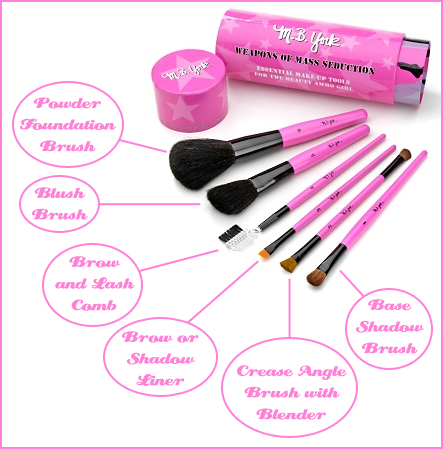
Sissy ladies, makeup brush sets are your weapons of mass seduction! Most of those little brushes, or sponges that come with makeup powder palettes are not good at all for applying makeup. The makeup will look patchy, or streaky. However there are a lot of beautiful brush sets you can buy that work much better. Makeup brushes are mostly for er makeup. If you try to use them with cream makeup the makeup will look streaky. A lot of powder makeup palettes assume you already have separate makeup brushes, and some wonderful techniques you couldn't do without the types of makeup brushes that come seperately. Its important to wash these brushes regularly to avoid germs, pollutants and left over makeup residue from getting on your face. You can clean them with baby shampoo, mild shampoo or makeup remover, along with running them under warm water, and let them air dry. Check out this guide to see what each brush is for:
 Powder Puffs
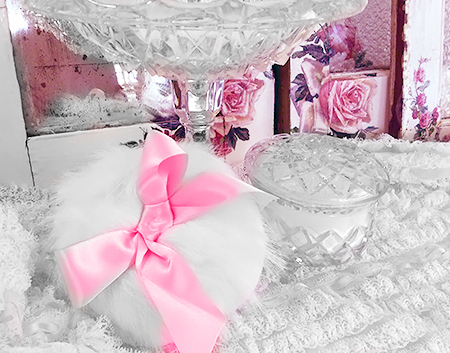
Powder Puffs are also best for applying powder makeup. In my experience they work best with blending, and especially big areas like with blush, bronzer around the chin. These are wonderful for applying powder makeup to big areas. Like brushes, you can also clean them with baby shampoo, mild shampoo or makeup remover, along with running them under warm water, and let them air dry.
 Beauty Blenders
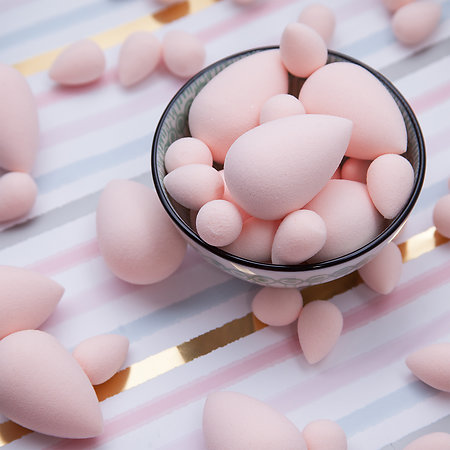
While brushes, and powder puffs are best for blending powder makeup, Beauty Blenders are perfect for blending cream makeup, like your concealer/foundation on the face. They are little cosmetic sponges, and your makeup will look a lot more smooth than if you did it with your fingers.
First, poar it under water, and then squeeze it in a towel until it's completely dry. Water causes the sponge to swell, and become a perfect texture for blending. Though it also needs to be dry so the water doesn't wipe away the makeup. When applying, don’t Rub! Bounce it along the skin, pressing very slightly on the surface for the best blend. We call that stippling.
Alot of people say these suck makeup into the sponge, making your makeup forever lost! *gasp* If this happens it simply means you pressed too hard. These only need a very slight dab to the skin.
These are also a perfect makeup eraser if you added too much blush, or your foundation lines went too far. For erasing, apply moisturizer, or makeup remover precisely to the affected area, and then drag the blender over that area, instead of stippling it.
Once you've used them so much there's a lot of makeup on them you can run, and squeeze them under water, and dry them with a towel again to apply makeup with a clean blender again.
They're also perfect for applying sunscreen, moisturizer, serums, primers, etc. evenly. Also ensuring they absorb perfectly into the skin. What can't the little squishies do????
I'll explain the different kinds makeup, in the order of the way that is best to apply them. So Eyelash Curlers are the best thing to start with, as odd as it may sound:
Eyelash curlers
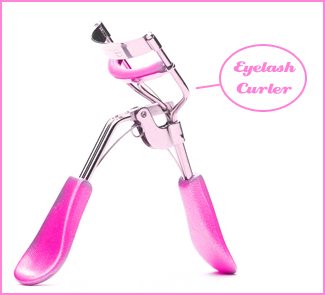
Another makeup tool is an eyelash curler. I think its best to use an eyelash curler before you put on make up to avoid having an eyelash curler print in your foundation or eyeshadow. Curling your eyelashes makes your eyes look wider & brighter. Also metal eyelash curlers are better than plastic. You'll want to replace the pads on the curler every 2 months.
Eyelash curlers work best on clean eyelashes. Make sure eyelashes are free of mascara. If necessary, use eye makeup remover to remove old mascara. With your blow dryer on low heat, blow air on the curler for no more than 5 seconds. Touch the metal. If it's hot, let it cool for a few seconds. You don't want to burn your eyelid. Open up the curler, clamp lashes near the roots. Hold for 10-30 seconds. Never curl lashes after you apply mascara because as the mascara dries, lashes can stick to the curler & be torn from the roots. There is no need to bother curling bottom lashes.
Begin any makeup application with moisturized skin and conditioned lips (find a facial moisturizer and a lip balm you love and use them religiously).
Preparing To Put On Makeup
The best time to remove facial hair is after you take a shower and moisturize. For shaving, Trans Ladies need very good razors to hide facial hair. Try to get the most close & smooth shave you can so your makeup will be smooth, but don't shave so much to where it irritates or hurts your skin. Apply shaving cream, most shaving creams soften your hair by 70% more if you wait three minutes with it on. You can feel around to see if you have any not so smooth areas and shave those areas some more. If you have any bleeding spots apply cold water on them to slow down bleeding and tear a small piece of tissue and place it on the bleeding spot. This helps stop a red spot from being there after it stops bleeding. You might need to wait 10 to 15 minutes before the bleeding stops. A styptic pencil will also stop any bleeding from cuts.
Now before applying makeup on the face it's best to apply your best makeup cleanser, and then moisturize your face. Check out the Skin Care page for Cleansers, and Moisturizers that have worked the best in my experience. Some moisturizers leave a bit of residue after applying them that may mess up the look of the concealer/foundation. So you can lightly wipe the residue away with a towel, or something like that. Just avoid wiping so hard it removes the moisture from the face.
Remember if you're using both cream, and powder makeup, cream makeup needs to be applied before any powder makeup, or it will not blend well together.
Under Eye Makeup
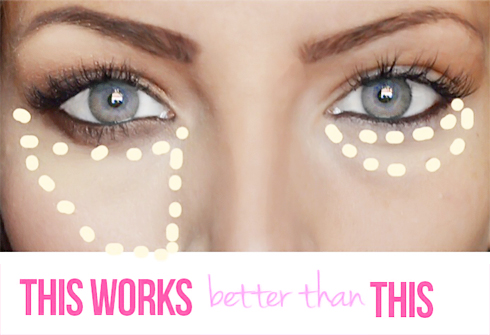
We can cover under eye circles here if you're using a cream concealer. For powder, add it after you apply foundation. You may want to apply under eye concealer if you want to hide any dark circles, or just make the skin under the eye look bright, which looks wonderful, you can use a concealer with a beauty blender. A beauty blender applies it smoothly around the under eye wrinkles the best. Under the eyes the best color you can use is any concealer with a yellowish tone closest to your skin color, because yellow neutralizes the brownish and blueish tints. Try to avoid white, a lot of people try to use white thinking its going to wipe them out but it just gives them white raccoon eyes. You can put foundation under the eyes once you put the yellow tone and one that matches your skin tone the best or it will just stand out.
Another thing about under eye makeup:
 Apply Concealer & Foundation
You can buy facial hair cover at any transgender shops, but concealer also does very well, there are also tattoo concealers that may work. The best colors to get for covering facial hair with concealer are yellowish or blueish tones and that also are closest to your natural skin tones. You can use a beauty blender, or your finger tips to put on concealer. Apply concealer around the shadow area with a soft upwards patting motion and make sure it is evenly blended all over. Let it sit for a minute before applying foundation.
From a lot of experience with different types of makeup, my go to concealer is
CoverBlend's Multi-Function Concealer. It's wonderful at hiding shadows. I use it as a foundation for the face even though it's a concealer. It can be used as both. Once it dries it looks & feels like natural skin. There's not too much shine. It's also not easy for it to smudge. You can apply blush, or facial powder easily after it dries, which is why I recommend it.
If their colors don't match your skin color a trick you can do with any makeup color is to buy some makeup mixer jars at a place like Ebay. They're tiny jars you can store makeup in. Then get the lighter, and darker shades of the makeup you want. Try to get the lighter, and darker shades that are closest your skin color. Then you can mix them in the jars to make them match your skin.
When looking for cream, and powder foundation you want to find the best ones that match your skin color and they both need to be the same color. People don't always apply foundation completely over the face. If you have a problem area where the makeup makes your skin look worse you can avoid those areas by making a very well blended border of makeup around that area. If your makeup matches your skin enough people will not notice the border. Don't forget the neck or your foundation will be obvious. You can even apply to the cleavage area and all the way to the neck line of your clothing. Careful not to get any on your clothing.
For big pores, and wrinkles you can try applying a makeup primer to the face before applying concealer, or foundation. Makeup primer is meant to fill in the gaps in your skin so the makeup you apply next will go on smoothly to the face, and it makes those pores, and wrinkles less visible.
After applying concealer, and foundation, you can take a large powder puff, or your biggest makeup brush, and lightly dip it in powder, too much powder doesn't look natural and it will make wrinkles more apparent. Now pat the powder puff lightly, also so that it mixes with the cream foundation and makes an even finish. No rubbing as this can cause streaking in your foundation. The powder evens it out even more and sets it better as well as taking away shine but leaving a healthy sheen.
Highlighters & Shadows
I can't say enough how much highlighters make so much difference for a beautiful natural look. If you finish your makeup with a shimmery, dewy, light highlighter on the cheeks, or any of the light spots in the image below, it will make so much difference. You can also use these methods to give the illusion of your face being another shape.
You can use highlighter (Also called Luminizers, and Luminous Makeup) powder for highlighting your face, or any powder makeup that's lighter than your skin color. For shadow, bronzer powder works the best, but you can also use any makeup powder with a darker skin tone than your regular skin tone where you would like shadows to be. Blush powder will work as well if it's close to the makeup color of the rest of your face. Add shadow first, and where you want it to look like the skin is going inward. Add highlighter where you want it to look like light is gracing your face, and its going outward, and the highlighters can be shimmery, dewy, glittery, etc.
You can use these images below as a guide of where to apply highlighters & shadows.
Make an exclamation point on your nose with highlighter. It will make your nose more skinny, and super cute!
Try to only go a little darker than your natural skin tone with the shadow. It's easy, for shadows especially, to look fake when they are too dark, and away from your regular skin tone. You can use blush for the shadow in the lower cheek area in the image for shadows if you'd like.
To make the chin look smaller you can use bronzer shadow around the chin. Make sure it's properly blended. Try making a surprised face, with your mouth in an O shape. If you see a noticably fake looking line rise up your chin it needs to be blended more.
For shadows, the nose looks better with a more matte powder shadow, while every where else with shadow looks good with glowy, shimmery, or dewy bronzer powder. The nose with highlighter, however, can be more shimmery.
Eyebrows
Feminizing the eyebrows can dramatically feminize the face because the eyebrows and eyes are the most expressive area of the body. They provide a frame for your face. The proper shape can provide an instant eye lift, while a poorly shaped brow can darken and obscure the eyes or create a perpetual unwanted expression. Darker, and defined eyebrows gives such a girly look.
You can use an eyebrow pencil to draw your eyebrow, and you don't have completely remove all of your eyebrow hair. You can use tweezers to tweeze out the hair around the area you are going to draw on, and the remaining hair will help it look more natural. You can trim the remaining hair if any are so long they stick out. There are many eyebrow trimmers in beauty stores. For more colorful eyebrows, if you are using more colorful makeup, Lip Pencils usually have more color choices, and can be used on the eyebrows as well.
You can go to
Google Images to look at pics of models, and celebrities to see what brow shapes they have that you love.
Try to not go extremely far away from the arch of your natural brow bone, but you possibly could cheat by going a little higher, and still look natural. It's different with different people. Try to make the arch peeking about 70% towards the ends. Transgender girls tend to have bigger brow bones. So thicker, long, and defined eyebrows would probably be very beautiful on you, and it would make the browbone look smaller, like the eyebrows below.
Eyebrows are known for being hard to draw, but don't worry you can fix it by getting your best concealer, and the smallest makeup brush with a flat end, and dabbing a little bit of the concealer evenly on the end of the makeup brush. Then apply the concealer around the of the eyebrow to correct mistakes. Some people also do it on top. At first the concealer may look like it sticks out, but just blend it after it's around the eye brows.
If you mess up with the concealer you can go over it with the eyebrow pencil, and then concealer, and then eyebrow pencil, back, and forth, and so on.....until it's how you want it lol.
The concealer will also give your brow bone a beautiful highlighted look.
A very slight upwards turn on the inner ends of the eyebrows usually gives a more sweet, and innocent look.
To make them look natural, and yet beautifully feminine you can feather out the inner ends, and make the outer ends very defined, and unfeathered. One way to feather the inner ends is to add your powder foundation with your skin color on a medium sized brush, and lightly dab the inner ends with the brush until the look faded/feathered.
A saying in the makeup world is, your eyebrows don't have to be twins, just sisters.
When using an eyebrow pencil, make sure it is sharpened and then use little feather-like strokes.
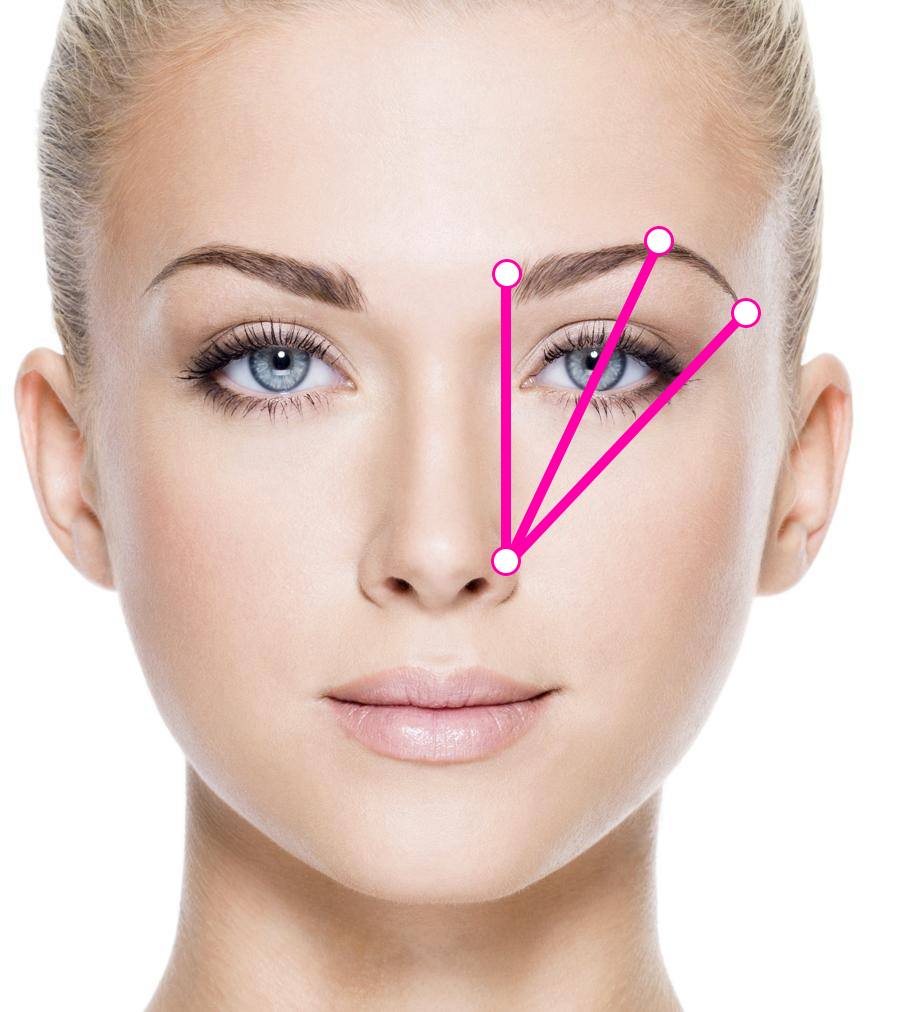
Aligning The Eyebrows
❤ The inner part of the brow should vertically align with the center of the nostril.
❤ The center of the nostril lined to the center of the low eyelid shows where the climax of the brows arch is.
❤ The outer edge of the brow should align with the corner of the eye and the center of the nostril.
❤ The inner and outer edges should be horizontally even to avoid unintentional expressions.
❤ Symmetry is key between both brows to prevent a skewed, disproportionate appearance.
❤ Sharp angles are unnatural and will create false expressions, keep the brow gently curving following its natural shape for the best results.
 Eye shadow
When putting on eye shadow you can try this. Apply a "base" lighter color over the entire eyelid and under the eyebrow, be careful not to let any access eyeshadow to fall on the cheeks or under the eye. You can also apply concealer around the eye as a base, and it's best to use a makeup sponge, or beauty blender that blends foundation on the face. Now you have your base for applying eyeshadow.
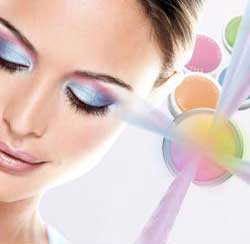
Choose a mediumly darker color and apply it to the inner third of the eyelid and "run" it to about half way to the corner of the outer eye. When applying eyeshadow to the crease of the eye, keep your eyes open and slightly tilt your head backwards. This will enable you to better see the shape you are creating and allowing the shadow to go into the crease.
Then apply the darkest color in a thin but blended fashion above the eyelash. Blend away any viewable lines in the eyeshadow.
Here are eye shadow color tips depending on the color of your eyes:
 Green/Hazel Eyes
Make those brilliant green eyes sparkle like dazzling emeralds. To highlight green eyes, utilize shades of browns, lavender, gold, bronze ,gray, earthy tones, fleshy, dark greens or olive. Purple shades in direct contrast with green eyes will create a dramatic contrasting effect.
 Blue Eyes
Want those baby blues to shine like a clear summer sky or glisten like a tropical sea? To emphasize blue eyes use violets and lavenders, neutral, gold, bronze, silver and silver grays, mauve, brown pink and fleshly or rose shadows. Warm hues will contrast the coldness of blue eyes, making them really pop.
 Brown Eyes
Brown eyes are the color of fine grains of sand or deep mahogany. To draw attention to brown eyes try blue, pink, plum, burnt orange, bronze, khaki pewter, fleshy and gold tones. These shades will accentuate the various shades of brown eyes. Lighter shades give better results. Darker shades should be used in the crease of the eye and blended outward. Shadows that display shimmery textures work best.
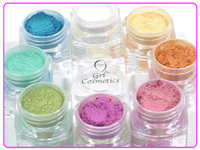
The key to making your eyes "stand out" is to use light colored eye shadow. Try using a light base shadow like a pale pink, yellow, cream or beige. Apply the light color all over your eyelid and then to accent the eyes use a darker shade only in the outer corners and sparingly. If you use dark colors on the lids or in the crease you will create a closing effect and make the eye appear to be even farther back.
You can lightly wet eye shadow powders if you want the color to show up more prominently.
As long as the shadow you use is a powder, you can go back and add more, even after it's set with translucent powder, to get to the level of intensity you want. Then dust with translucent powder again.
An eye shadow color thats opposite of your eyes color really makes your eyes stand out. Like purple eyeshadow on green eyes is very pretty.
Eyeliner
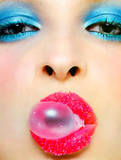
Applied correctly eyeliner can make your eyes look much bigger. It can change the size and shape your eyes. If you have more round eyes, you can apply it to the outer corners to lengthen and shape. To make the perfect line always make sure it is sharp enough with a pencil sharpener or even tissue if the eyeliner material is soft enough. If your eyeliner looks harsh on your eyelid, you can soften your look by smudging with a Q-Tip smudger or a cotton ball for a softer look.
Theres lots of ways to apply eyeliner. There is the thin liner make up brush (with cake or cream liner), the liquid liner for a defined and emphasized look or the eyeliner pencil that gives a soft look.
If you have any areas around your eyes you would like to change but follow the natural shape of your eyes this will only highlight those areas. The best thing to do, is to start at the outer corner and line inward, shaping your eyes as your go. Try pulling the eye lid outwards, for a more accurate line.
Tilting the head back a bit while slightly closing the eye your applying eyeliner with helps you see how you are applying it better.
Unless you are absolutely, positively sure you can achieve it, there isn't any need for eyeliner under the eye. If done incorrectly, it can make you look like a raccoon.
For a soft look, avoid eyeliner in a harsh black, instead, go for a darker version of the eyeshadow you'll apply over. Like for instance, if you're about to apply a nice pale violet on your eyelids, try a dark plum or eggplant colored eyeliner.
Mascara
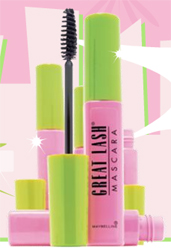
Mascara can emphasize, thicken, lengthen, and define lashes. Some brushes can be straight or curved, to curl eye lashes, with fine or thick bristles. There is waterproof, non water-resistant, and long lasting mascaras. Each you can use for different occasions. There are also mascaras that give a strengthening white base coat that nourishes, thickens and prepares your lashes to receive color.
Slide the wand out of the bottle and dab excess on a tissue paper. One thing we got to watch out for when putting on mascara is, clumping, thats why the brush is there, to brush out those clumps. Always hold the brush horizontally. Wiggle the wand at the roots of your eyelashes and slowly rotating the brush upwards and slowly sweeping them upwards as you reach the tips of your eyelashes. Careful not to scratch your eyes with the brush. If you have an extra eyelash brush like in the one in the make up brush set that was mentioned, that is definitely a perk. So you can have a mascara covered brush for applying and a clean one brushing out the clumps or to curl them upwards even more. It definitely makes more even and less clumpy eye lashes. Applying mascara only on the tips may make them look unnatural. You can keep the eye closed until it dries to avoid any access mascara around the eyes. If you have any you can lightly dip a tissue in make up remover so its damp, and not wet, to remove it.
Remember to remove eye make up before going to bed so any eye makeup will not get into the eyes and its more healthy for your lashes.
False Eyelashes
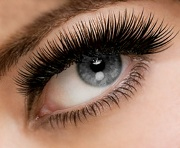
If you want more volume & fullness in your eye lashes than mascara could ever provide, you'll love false eyelashes. You can apply mascara before them, and then mascara again after they are dried for the most volume & fullness. Keep in mind when buying them that many false eye lashes make you buy the lash glue seperately.
Here is how to apply false eyelashes:
❤ First trim the lash strip so that it fits the width of your eyelid. Any sharp scissors will do the trick.
❤ Then apply a thin line of lash glue along the false lashes. Let it dry until it becomes sticky.
❤ Application is easiest if you're looking down, so get close to the mirror and place the lashes directly across your natural lash line on the eyelid side of your lashes.
❤ If it need any adjusting you can use your long fingernails or tweezers.
❤ Finish with a light coat of mascara to blend your natural lashes and the false lashes. Clear mascara works well if you don't want to add color.
❤ Be patient and leave enough time to work slowly at first as perfect application may take a time or two to achieve.
❤ When you want to remove them, follow the directions on your glue for removing the false eyelashes.
 Lipstick
Lipstick is always best to be put on as a final touch with the rest of the make up, like the cherry on top. With these tips you can have your lips looking like they were done by a professional make up artist.
While preparing to put on lipstick you can wet your lips and then you can use a toothbrush for removing any dead skin cells to give you smooth lips. Its important to make sure the tooth brush is not old with loose bristols and it needs to have soft and smooth bristols or it could harm to your lips instead of help them.
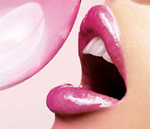
Lipstick goes on smoother if you apply lip balm before before putting on the lipstick. Beautiful lips are moisturized lips. The best lip balm I've tried has been
Carmex. That lip balm really does deeply penetrate your lips to add moisture. It's not just saying it. I really did use to have dry cracking lips no matter what lip balm I used, but this lip balm transformed my lips to very smooth, and moisturized lips.
It's kind of funny because the brand doesn't look like a beauty product at all. At first I thought it was something you wax your car compartment with, or something lol. If I want it in a cuter container I'll put it in a makeup mixer jar. If it works best, it works best. That's what I look for in beauty products.
After the lip balm, lightly wipe off any access residue of the lip balm, and you can apply foundation powder as a base on the lips. This gives the lipstick a clean canvas and covers any tiny lines in the lips. It also makes it longer lasting and less likely to smudge. Now start with a lip pencil, and make sure the pencil is pretty sharpened, or it will not give defined lip lines. Starting in the middle of the "cupids bow" (the upper lips are called cupids bow) outwardly giving short featured strokes along your natural lip line. Keeping your mouth closed and relaxed. You can hold the lip pencil with both hands, or rest your hand on something nearby to help you be precise. Now start from the middle to the outer corners on the lower lips in the same way. Fill in the lip from the middle to the corners as well. Lips look younger when the lower lip is more pouty. Pout your lips, open them up, and brush the color into the corners, so that there are no unfinished edges. Take care in staying within the lip liners edges.
If you fill in the rest of your lips with the lip pencil, and then add lipstick on top, the lipstick will last longer. If it wears off you still have the lipstick pencil underneath. Using a Lip Pencil without Lipstick on top of it make the lips look, and last as long as matte lipstick (without the clumpiness of matte lipstick). Be aware that darker lip liner will darken the look of your lipstick. If you are going for a light look use a light lip liner.
Now you can apply lipstick in the same way you did with the lip pencil. Then very lightly kiss a tissue paper with your lips. Touch up with some more lipstick for a second coating. Now you can apply shiny lip gloss as a topping if you want to!
For shimmery, foiled, or sparkly lips, that look as good as expensive lipstick making these claims you can simply add shimmery, sparkly, etc. eyeshadow, or highlighter on top of the lips after applying lipstick, and smooth it into the lipstick, however much you think is best. It's gorgeous, and a trick makeup professionals have done for a long time!
❤ Remember you might need to reapply after 12 hours, meals, drinking from a glass.
❤ Try to get used to not "eating" your lipstick while it is on your lips.
❤ If you have any lipsticks with colors you don't like you can always try mixing them together to see what color you can come up with. Even with lip gloss, and something with sparkle too!
❤ To avoid your lipstick from feathering out, outline your lips with lip liner and lip pencils.
❤ The older you get the more moisture your lips need and women over 50 especially look good with very creamy and glossy lips.
❤ How to keep the lipstick on your lips instead of your teeth. After applying lipstick, take your index finger and pop it in your mouth, then pull it out. So the access lipstick will be on your finger rather than your teeth.
❤ Got the blues because of yellow teeth under your lipstick? Make lemons into lemonade with this trick. Blueish lipstick neutralizes yellow color so they will give the illusion of being more white. Shades that work include plums, blues and violets.
❤ You may want to use a Lip Brush to apply lipstick. Why a Lip Brush? Lip brushes allow you to use less lipstick but it also can be used to soften the line of your lip liner. With the brush, you can blend it right into the lipstick so that it is not visible.
❤ If your running out of lipstick to where there is a tiny bit in the tube, scrape out the last bits with a cotton swap or stick & mix it with Vaseline or lip gloss in a lipstick palette. Use a lip brush to apply.
❤ During the winter months, you might want to stay away from the lipsticks that claim that they are long lasting. Often they can dry your lips out and cold weather will do that fast enough. Instead look for creamy formulations.
❤ Have tiny lines in your lips you would like to be less noticeable? Try this out. Apply lipstick vertically instead of horizontally.
Fuller Pouty lips
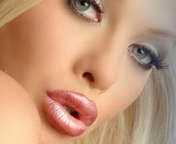
Dreaming of a full, pouty mouth? The secret to a sensual pout is priming them with balm before adding color. Start at the corners and go inwards with a lip pencil, and then do the same with the lipstick instead of starting in the middle. Go just outside your natural lip line with the lip pencil, but not too far. Always make sure your lip pencil matches your lipstick. For more of an illusion of a pout in the lips you can try applying a little lighter colored lipstick in the middle of the lips and blend. Dark colors make lips look thin so avoid anything too dark if you're trying to make your lips look bigger. You can finish the look with lightly applying lip gloss as a topping. What a pouty princess!
Lip Plumpers
Angelina Jolie lips are now within the reach of us mere mortals, with the latest lip plumpers, full of boosting ingredients, collagen stimulators and hyaluronic acid. A new pout without the aid of a syringe!
Lip Gloss
Lip gloss is wonderful for making your lips or so shiny and moisturized! One of the main things with lip gloss is that it doesn't often stay on for very long. Go for the stickiest one you can find for more staying power. You can also use it as a topcoat, or over a tinted lip balm for a dash of color. You can try lining your lips with a matching lip liner, then blotting lip gloss on top so it has something to stick to. With lip pencils try dipping your lip pencil in gloss before applying, for an even finish.
Setting Spray
Setting Spray is frequently overlooked, and yet a key part of a makeup routine, and will make your makeup look a lot more beautiful. It's a clear liquid, and when you're completley finished with your makeup you can spray this a couple times around your face, and it will lock in your makeup, make the makeup look more like it all naturally goes together, and it will give it all a healthy, natural glow. It'll also make it so the makeup will not smudge, or run. It helps lipstick, and everything stay in place. Some powders look too matte, or cakey, and different makeup brands used together also sometimes don't have a good texture together, and that's what setting spray is also there for.
Be aware, setting sprays usually spray out hard lol. It feels so wet you wonder if it just ruined your makeup, but just wait, be patient for a few minutes without touching anything. That'll give it time to dry. Once it dries you feel it lock the makeup in, and the makeup will look even more wonderful.
Other Lovely Places To Learn
You can also check out the bountiful amount of makeup videos on YouTube, and find the kind of makeup looks you're looking for, and what's the newest makeup updates.
It will help trans girls a lot to observe the makeup of beautiful transgender models. They have facial shapes, and more just like you, so it would help a lot to learn from them. Some of them have YouTube channels, where they give makeup tips. Others also have Twitter, Instagram, Facebook, etc. accounts where they may share their secrets & tips.
Beautiful Transgender Models
Pretty Nails
A beautiful nail is a well-prepared nail, even the best quality nail varnishes will lose some of their luster if the nail underneath is in bad condition. To get the most out of the color and help it last longer, follow our guide to preparing your nails. File them regularly to keep them in shape and never use nail cutters, which can cause grooves and shattering. Always push your cuticles back before applying color, or use a cuticle remover.
Massage the cuticle remover right into the nails, to soften the skin and get rid of build-up. I recommend soaking your nails in warm water and lemon, with a little olive oil to keep your hands soft.
Take a small smooth stick and push back your cuticles. Protect your nail by covering it with a little cotton wool. Push gently, and cuticle build-up will disappear, leaving you with a clean, clear nail. Tissue off any residue, your nails should already look more healthy. Remove any dead skin at the sides of your nails with a nail clipper. Massage and moisturize your hands with a good-quality hand cream. A good tips from the pros is to polish your nails with a buffer to smooth out any ridges, and make them shiny. Finally, use the end of your small stick to clean under your nails. Always, always protect your nails! Applying a strengthening base coat also prevents discoloration from strong colors. Gently brush it over the whole nail. Choose a base coat which suits your nails, nourishing, strengthening, whitening or anti-ridge. Brighten up the tips of your nails with a whitening pencil on the underside. With the right techniques, there's no need to be afraid of color! Go for bright red or any color that makes your outfit pop! Rest your elbow on the tabletop to keep it steady. Don't use too much color at a time. Start with a stroke of varnish down the center of the nail. Don't try to cover the whole nail, leave a little space down the side of each nail so that you don't get color all over your fingers! This also shapes your nails, making them look much slimmer. Even the pros make mistakes. Sort them out with a cotton bud dipped in nail varnish remover will do the job to avoid scraping it off. Finish with a protective top coat, to strengthen the varnish and keep it looking fresh for longer.
A quick way to have fabulous nails is clip ons, they can also be called press ons. There is pretty nail jewelry you can glue on your nails. There is also all sorts of nail art out there to get ideas of how to decorate and have fun with your nails! Just look up "nail art" in any search engine.

Check out these photos to see what the effects of makeup can do:
There's also a Reddit group called Makeup Addiction which is full of wonderfully helpful information! They also have guides, and tutorials on the right.